How to Perform a VO2 Max Test with VO2 Master
Learn how to conduct a VO2 max test using the VO2 Master portable metabolic analyzer—a wireless, lab-grade device that allows for accurate testing in real-world environments. This step-by-step article covers test setup, execution, and key insights for optimizing client performance.
VO2 max testing is one of the most accurate and effective ways to measure an individual’s cardiovascular fitness and endurance capacity.
Traditionally, VO2 max testing was only available in labs or hospitals, but with the VO2 Master portable analyzer, coaches, trainers, and health professionals can now conduct these tests just about anywhere indoors or outside.
This article will walk you through the steps of performing a VO2 max test with the VO2 Master to help ensure you perform all the key steps.
Why Use the VO2 Master for VO2 Max Testing?
The VO2 Master is a portable, wireless metabolic analyzer that simplifies VO2 max testing and provides accuracy similar to traditional lab carts.
Unlike traditional laboratory equipment, the VO2 Master eliminates the need for tubes or backpacks, and allows users to conduct tests in real-world conditions like a bike or track as well as the common treadmill and ergometer set ups.

5 Steps for Conducting a VO2 Max Test with VO2 Master
When you’re ready to do VO2 max testing with your VO2 Master portable metabolic analyzer, there are five steps you need to follow.
Step 1: Client Questions on Fitness
The first step in performing a graded exercise test is to ask your client some questions related to their current level of fitness, health, and readiness for testing.
Asking questions related to the type, frequency and intensity of their current exercise activities will help you to determine what level to start their test at and if you should choose a submaximal or VO2 max test.
Discuss how they should be working to get the best results for their client by asking proper questions prior to testing for protocol setup so you choose a mode for them that is similar to the physical activities they engage in most regularly.
- Determine what type of exercise is preferred
- Cients’ preferred method of exercise, or whatever will be most safe (cycling for people who don’t run).
- Determine capabilities (length, intensity of normal workouts)
- Longer duration testing steps can be used for individuals who are more fit and racing longer races
- Shorter duration testing steps used for less trained individuals or individuals looking for best measurement of VO2max (if racing shorter distances.)
- Stage lengths can be adjusted
- Intensity adjustment should be determined based off the information provided by client so you know you’ll get them through the 8 stages.
Further reading on whether to choose and max or submax test this can be found on this blog: Submaximal or VO2max Testing
At this time, you also want to determine if your client has any contraindications that would preclude maximal exercise testing.
Basic guidelines can be found in the VO2 Master manual. For more detailed guidelines, refer to the American College of Sports Medicine or the Canadian Society of Exercise Physiology.
Step 2: Preparing Your Client for the VO2 Max Test
Before performing a VO2 max test, the client should follow these preparation steps:
- Ensure Proper Hydration & Nutrition: Avoid heavy meals at least two hours before the test, and stay well-hydrated.
- Avoid Stimulants & Alcohol: Caffeine and alcohol can influence heart rate and oxygen consumption, leading to inaccurate readings.
- Wear Proper Attire: Use comfortable workout gear and appropriate footwear for running or cycling.
Step 3: Performing the VO2 Max Test
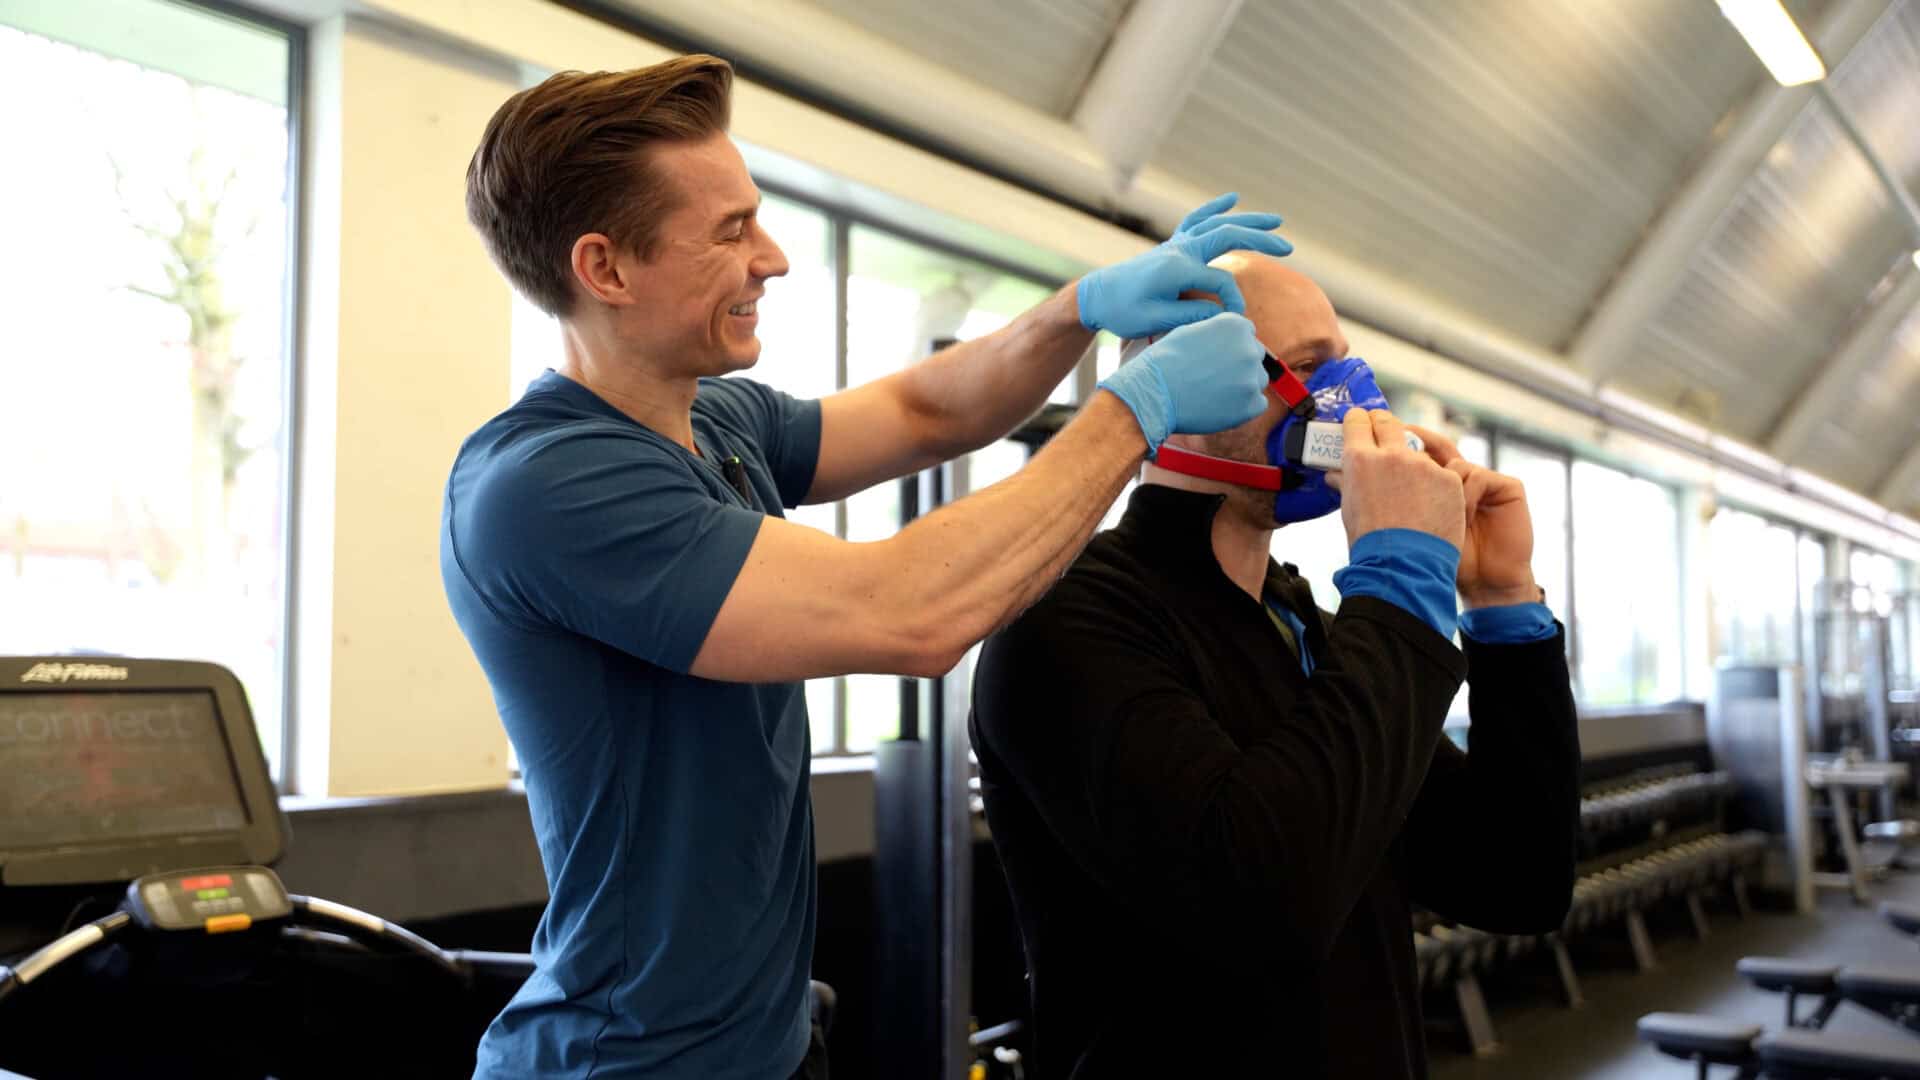
Next, set up the VO2 Master analyzer and perform the test wearing surgical gloves. Check your latex or nitrile gloves, ensure they are a brand that allows you to operate a smart phone or tablet.
Here’s how to do it.
1. Turn On Your VO2 Master
Turn on the VO2 Master and pair it with the VO2 Master app on your smartphone or tablet (not a laptop).
2. Select a Testing Protocol
There are multiple protocols to measure VO2 max.
The graded exercise test (GXT) is considered the ‘gold standard’ for cardiopulmonary exercise testing (CPET) and a commonly used protocol with a ramp/step test performed on a treadmill or bike.
A graded exercise test allows for a gradual and linear increase in speed or watts from low to high intensity.
Using this approach allows you to assess the physiological response through the full spectrum from resting to maximal intensity.
It also enables you to establish ventilatory thresholds, helping you define precise training zones for your athlete or client. Additionally, it provides an accurate measurement of VO2 max, allowing you to assess how they compare to others in their demographic based on age and gender.
We recommend using an ergometer or treadmill as they provide stable output metrics, however, any piece of equipment that will allow you to increase intensity in a stepwise manner will work for a VO2 max test. VO2 Master is currently not aware of any treadmills which are directly compatible with the VO2 Master Manager app. This means that for treadmill testing, you will need to manually increase the speed and/or incline on the treadmill to match the target speed and/or incline showing on the protocol you have entered into the app.
It’s important to note that some treadmills may be limited in terms of maximum speed and/or incline. You should check your treadmill prior to testing to know if there are limitations.
The Bruce protocol allows the test to be completed without the need to run.
Test starting intensity is an important consideration.
Generally, you should target a warm up which corresponds to 50-60% of age-predicted HR max (220-age) or heart rate ~ 100 bpm.
We recommend a 10-minute warm-up at this low intensity. Then, the first stage should be at the same intensity.
The goal is to have two to three stages before the test subject reaches their VT1.
It’s much better to start the test at too low an intensity than too high. The worst that could happen by starting too easy is the test subject will get a longer warm-up.
If the starting intensity resulted in a test which was too long, the starting intensity can be adjusted for subsequent testing.
For example, on a bike smart trainer this could be 40 watts and a heart rate around or below 100 bpm.
Note: Take a conservative approach to protocol setup. A test can be sped up if you are seeing a plateau (or decline) in heart rate (HR) during the test by selecting the “next” button. The test cannot be slowed down if you set the protocol too aggressively. If you are testing a client with low fitness, you could increase by 10 watts per test step, moderate fitness 20 watts per step, and an elite cyclist 30 watts per step.
The VO2 max test needs to be 8-12 test steps (maximum 15) because VO2 takes time to ramp up and you want to be able to collect accurate VO2 max and ventilatory thresholds.
When creating customizations within protocols, these can be saved as a custom template that will show up on the main list when coming back for the next test. You can also adjust protocols within the app.
3. VO2 Master Manager App: Setting Up Your Client Protocol
In the app, you will see that the Mask and User Piece screens are blurry until a selection is made.
It is extremely important for test accuracy and repeatability to use the correctly sized user piece and mask and ensure those sizes match what you enter in the app.
For example, if you use a mask that is too big on an individual, there could be air leaks in the mask, which would throw your numbers off. If you use the wrong user piece, then you may miss critical data at the beginning or end of the test.
Here are a few pointers you can follow:
- How to determine user piece: you have a choice between two user pieces for your GXT, medium and large. The large user piece is recommended for larger individuals (generally >5’10) who are endurance trained.
- How to determine mask size: Use measuring gauge to ensure best fit. Plug the hole of the mask and ask the individual to blow out, you shouldn’t hear any air leaks.
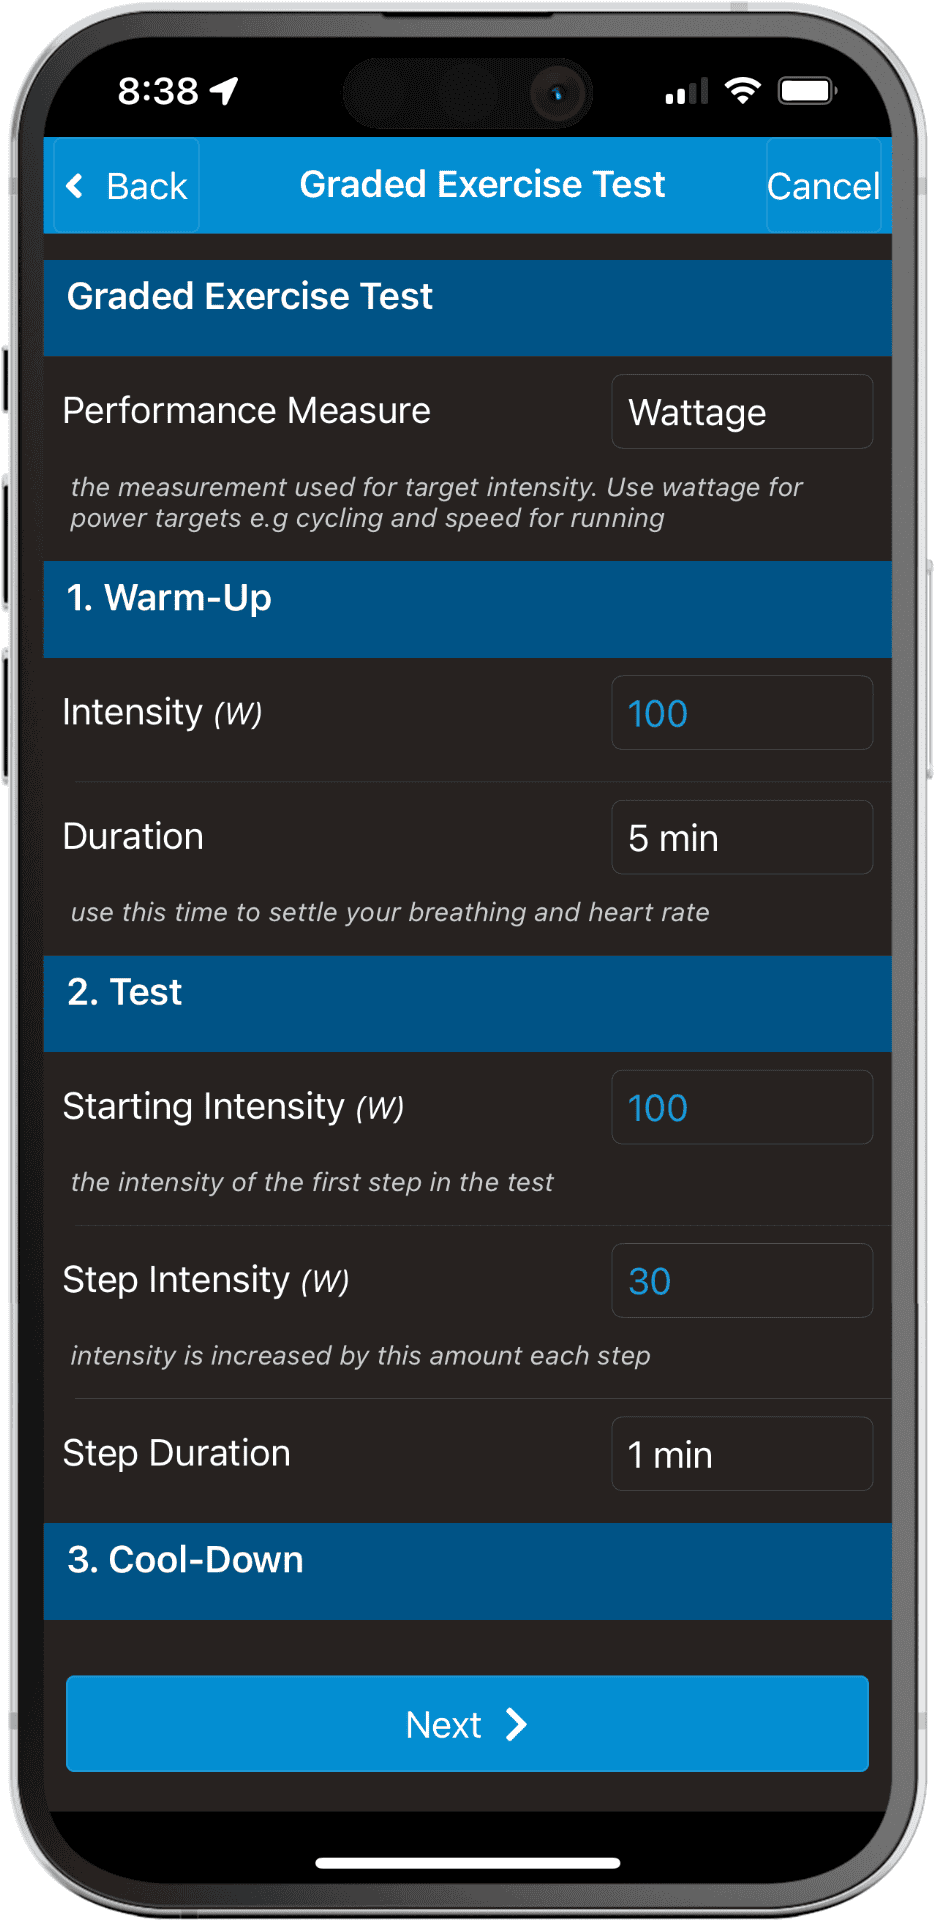
In the VO2 Master Manager app, you will click on each option to set up the protocol.
Warm-Up
- Intensity: Determine based on the participant
- Duration: For how long to warm up
Test
- Performance Measure: Wattage or Speed
- Starting Intensity: Determine based on participant
- Step Size: How much to increase intensity
- Step Duration: How long to stay at each intensity
Cool-Down
- Intensity: Determine based on the participant
- Duration: For how long to cool down
VO2 Master Manual
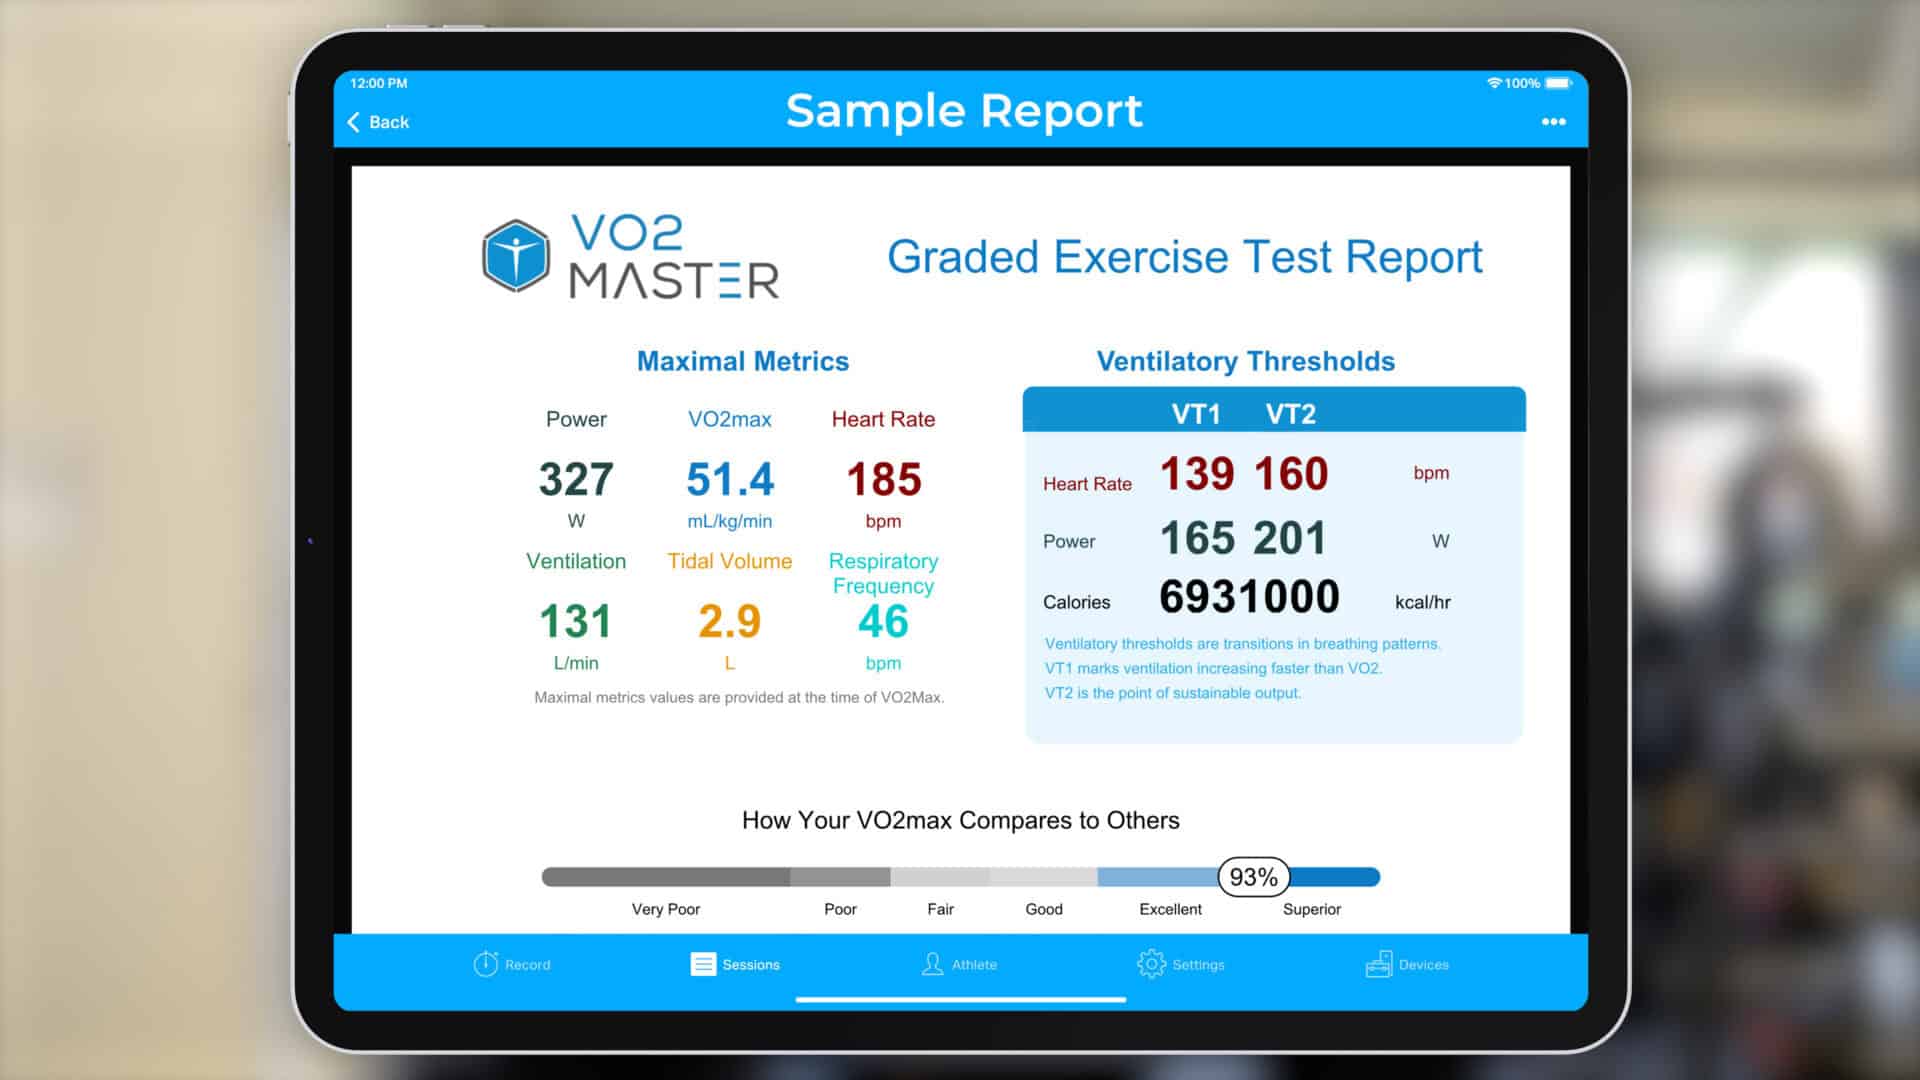
At the end of the test, the free app will provide a summary report showing the VO2 max based on a 60-second rolling average. Based on these results, the app will show where the athlete compares to the rest of the population based on their sex and age. Customers also have access to raw data if desired.
A detailed video regarding protocol setup is included in the Customer Essentials video series.
4. Calibration
Perform a calibration check to confirm accurate flow and oxygen sensor readings. The total calibration process takes 4-5 minutes. It is documented in the User Manual and Customer Essentials training videos.
Step 4: Sensor Equipment and Getting Your Client Ready to Begin the GXT Test
After removing the VO2 Master from the calibration syringe, take the silicone adapter off and connect the mask to the VO2 Master analyzer, use the locking tool to connect the turbine locking nut inside the mask.
Here’s what you need to do next.
1. Preparation
Ensure the heart rate monitor and any other sensors you are using are on the client being tested and connected.
2. Explanation
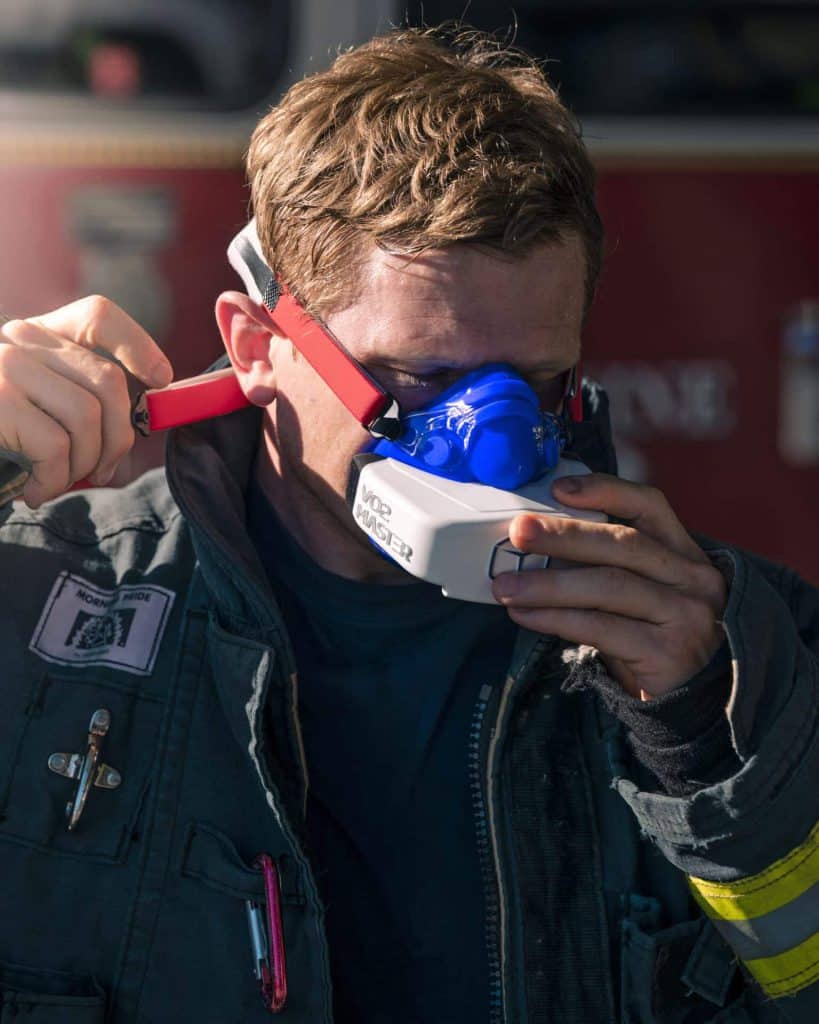
Place the mask on the client and explain what will happen during the test:
- Have the client hold the mask in a comfortable position.
- Attach the mask net, then tighten the mask straps down.
- Explain to your client that after the mask is on, they should not talk, and let them know you will ask them yes or no questions to ensure steady gas exchange and no spikes in data. To display their rate of perceived exertion (RPE) during the test, they can show it with their fingers how high it is.
- Explain the test process to the client, if you haven’t already. We’ve shared an example test instruction script below.
- If you want to take notes, hit “mark” on the app, and enter in the note, this could be lactate or other observations.
- The mask doesn’t have to stay on during the recovery portion.
From here, it’s a very good idea to follow a script.
An important consideration in test standardization is to provide instructions to the athlete using consistent wording.
Even small deviations from your ‘script’ may affect the outcome of the test.
Your test instructions should be provided immediately before the warm up begins, and before you put the mask on.
This way, the test subject has an opportunity to ask further questions.
In this example, a graded exercise test will be performed on a cycle ergometer to maximal intensity:
- You are going to perform a graded maximal bike test.
- The test will start at a low intensity of 40 watts and will progress in stages to a maximal, 10/10 effort.
- The test will increase in intensity in 20 w increments every minute
- The test, on average, lasts around 10 mins.
- During the test, try to maintain a consistent cadence and position on the bike. For most people this is around 80-100 RPM.
- The app will control the resistance. Do not attempt to change gears.
- Do not attempt to talk during the test. Try not to move around on the bike too much during the test.
- I will request your rating of perceived exertion on a scale of 1 to 10 in the final 30 seconds of each stage. 1 would be resting, 10 would be a maximum effort. When I ask for your RPE, please provide this by signaling using your fingers, not by trying to talk.
- Breath normally throughout the test.
- You may get out of the bike seat to push when the intensity becomes very hard (in the last stages or if uncomfortable).
- The test will end when you are unable to sustain an RPM greater than 70. The tester will notify you when you are dropping below 70 RPM so you have an opportunity to increase cadence.
- After the test, the mask and strap will be removed immediately by a staff member. Do not attempt to remove the mask yourself.
- If at any time you feel unwell, you are free to stop the test.
3. Start the Test
When you are ready, click start on the mobile app.
Have your client start exercising at a moderate intensity to warm up for 5–10 minutes and complete the test protocol.
- Follow the selected test protocol, gradually increasing intensity every minute or more depending on your protocol.
- During the Test, make sure you are giving your client queues for what is going to happen during each step of the test. It’s best if they know what is happening and when something new will happen. Make sure you are monitoring all of the data, how ventilation is changing, if there are sharp changes in ventilation, especially towards the end of the test, that is an indicator that the client may not continue much longer. At this point, make sure to cheer them on, remember the point of a maximal exercise test is to hit maximal exercise intensity!
- Ask for RPE in the final 30 seconds of each stage. Once the person reaches a 9/10 RPE, you can expect 1-3 more stages depending on their fitness level and the step duration.
- If they can’t maintain 70 RPMs despite encouragement, the test should be terminated.
- Continue until exhaustion or when a steady plateau in VO2 consumption is observed.
Note: For high performance situations and research you may also elect to do an optional re-calibration during test warm up.
The recalibration procedure is a simple step that can be performed by users who typically work with individuals exhibiting higher ventilation values and higher levels of fitness.
It can help provide the highest levels of accuracy with these individuals.
During a CPET test, the temperature of the analyzer will increase during the warmup. Performing an O2 sensor calibration allows a reset point to the higher sensor temperature generated during warm up.
To perform the recalibration, follow these steps:
- Perform a 10 minute warm up
- At the 8 minute mark, swipe right, press Manual O2 Calibration
The recalibration will take approximately one to two minutes and will complete prior to the first
stage of the test beginning.
Note that the recalibration should be performed with the mask on the face and the test subject
should continue exerting themselves at a warm up intensity.
During a recalibration, you will notice the VO2 data ‘drop out’. This is normal and is inconsequential as the procedure is performed during the warmup.
4. Real Time Data
The VO2 Master app will display oxygen consumption (VO2), heart rate, tidal volume, ventilation, respiratory frequency and power. Clients are very motivated to see their live data on your device, it is very helpful for them to really push for a maximal effort in the final stages of the test.
5. Cool Down & Recovery
After your client reaches exhaustion, remove the mask and slow their speed down to a light jog on the treadmill or easy ride on the bike for 5–10 minutes.
Step 5: Understanding the Metrics
After completing the test, the VO2 Master app will generate a report with key metrics:
- VO2max Score (mL/kg/min): The higher the number, the better the aerobic capacity.
- Max Heart Rate (HRmax): Indicates peak cardiovascular effort.
- Ventilatory Thresholds (VT1 & VT2): Highlights aerobic and anaerobic transition points.
- Training Zones: Provide information for optimal training program design depending on client goal.
- Comparison of Client Results: Compare with standard VO2 max reference values from the population based on age and gender to gauge fitness level. You will also be able to access all raw data through cloud reporting.
Note that if you have pro/elite athletes or VIP wellness clients being tested by your staff in other cities or countries, you can view the live cloud data while they are testing.
You can discuss their feedback on taking the test and their results, and get an instant summary report after they complete the cool down. You can email or print the report right from your phone or iPad.
Be sure to encourage hydration and stretching after the test.
Performing a VO2 max test with the VO2 Master portable analyzer allows coaches, health professionals and researchers a convenient, reliable, accurate and affordable way to measure cardiovascular fitness and use key metrics to optimize client training.